Showing posts with label Gina K Designs. Show all posts

Sunday, December 30, 2018

Happy New Year - a look back at 2018


Its almost time to ring in a new year! Hard to believe that 2019 is here already! 

I thought it would be fun to look back on a few of my favorite projects for the year. Underneath each photo, I will share a link to the original post. So if you want to learn more, or are interested in the products used, you can find it quickly and easily.

This first card may possibly be my favorite of the year. Reason being is, I envisioned this card quite a long time ago. Then, I was able to bring it to life, not only by creating it, but also using products that I designed! Once again releasing products with Papertrey Ink has been quite surreal! Its a huge learning curve each and every time. I am grateful for the challenge. But most of all, I am beyond thrilled when I see someone else using my products. Its indescribable really. Thank you for wanting to use the products that start as a crazy idea in my head. It truly is sharing a piece of yourself with the world when you design products. Thank you for encouraging me with your purchases!

More craziness from inside my head. When I designed Color Block Stencils, I wanted the creation of a trendy, yet timeless, color blocked background to be simple. These stencils allow you to ink unique backgrounds easily, as they line up with the outside of a standard A2 card.

Bold Basics was a stamp set that I also designed to work with Color Block Stencils. How elegant is this card when paired with florals?! The color combinations are endless. From girly to a card for the guys, I am very proud of the stencils!

This Love Word die is another one of my designs, but this carries an even larger piece of me as that is my very own handlettering! I was writing the word for a lettering challenge and Jennifer McGuire saw it and said she NEEDED it as a die! After I picked myself up off the floor, of COURSE I made it into a die! :D 

While this word die was released for the wedding season, with Valentine's Day approaching, I will be taking it out again!! For a video tutorial on this die and all the creative ways you can use it click here: 10 Ways to Be Creative with Die Cut Words

This card is on the top of my favorites list for sure! Colored pencils combined with a beautiful stencil from Gina K Designs! Stencils are a personal favorite tool for me. So much so, that I created a video tutorial showing you: 

This card started my obsession with a fall color palette. It was inspired by a floral arrangement I saw at Michael's. Fresh and trendy, I continued to be head-over-heels for it for months! The gorgeous image from Gina K Designs didn't hurt things either. Also, pop over to the blog post and check out how an accident made a lovely accent on this card! 

My favorite fall color palette paired up with a Die Kit of the Month from Spellbinders on this card. Along with sneaking in my own Color Block Stencils. I still love gold...


More Spellbinders fun, along with Pebbles. Pebbles has this sweet aesthetic that always calls to me. I guess you could say it is my happy place for supplies! 


I had to share a layout for this year. I still love taking photos. So much. But, I often forget to share them. This layout was of a trip my husband and I took in February. My husband was a finalist for Engineer of the Year at his company. It was an impressive feat as there are over 6,000 engineers in his company! We were taken on an all-expenses paid trip to Palm Beach, Florida. However, our first trip alone in over 8 years was quickly ruined as we both came down with Influenza A. We spent the time in bed with Tylenol, in a stunning hotel, on the ocean. Glad I was able to capture a few lovely shots of the scenery before it all hit!
At least we were together...

Mail It Monday moved itself over to Instagram and the community has grown immensely! There are over 1400 card-mailers joining in each week! Encouraging one another to mail cards. We share card drives for those needing extra love. Friendships have been formed. Small groups of card exchanges have begun. Its been so wonderful to watch how it grows. We would love for you to join in as well! Find Mail It Monday on Instagram. And if you want to become involved, simply post with the hashtag #mailitmonday. Your post will remind people to send love, send cards.

Once again, I want to end this year full of thanks and gratitude. Thank you for continuing to visit me here and on Instagram and on YouTube. Thank you for the comments, emails, and messages. I love them all---from kind comments to questions! Thank you for purchasing items through my affiliate links.When you click, you sent a small amount of money back my way. Those purchases help pay for swim lessons, tuba lessons, bass guitar lessons, and more. Being able to help my family in this way means so very much to me! I would hug you, if I could! Thank you for continuing to love the paper crafting industry. For supporting all the small businesses run by moms like me. Thank you for buying my stamps and dies as well! Thank you friends, thank you from the very bottom of my heart. Hey, from the very tips of my toes!

Happiest of New Years to you and yours! May 2019 be full of more happiness than sadness, more love than loss, and more wonderful moments of life!

Sincerely Yours,
All supplies are linked in the original posts. Thank you!

Tuesday, August 28, 2018

Rubeena's Crafting Anniversary Blog Hop DAY TWO + Giveaways

"Welcome to Rubeena’s Crafting Anniversary 2-Day Blog Hop! This hop is epic with more than 70 guests and over $1,000 in sponsored prizes! Not only are we celebrating four years since Rubeena first discovered card-making but also crafting in general. This industry is made up of wonderful individuals who are creative, inspirational, kind, and incredibly supportive! Hop along so you can learn about why we create and how much joy it brings us!"

It is always wonderful to support one another in this wonderful hobby! This hop is full of fabulous crafters and fabulous prizes and I am tickled to be a part of it! You should have arrived here from Taheerah Atchia's blog! If you are just joining in, head back to Rubeena's blog for a complete list of people for both days! 
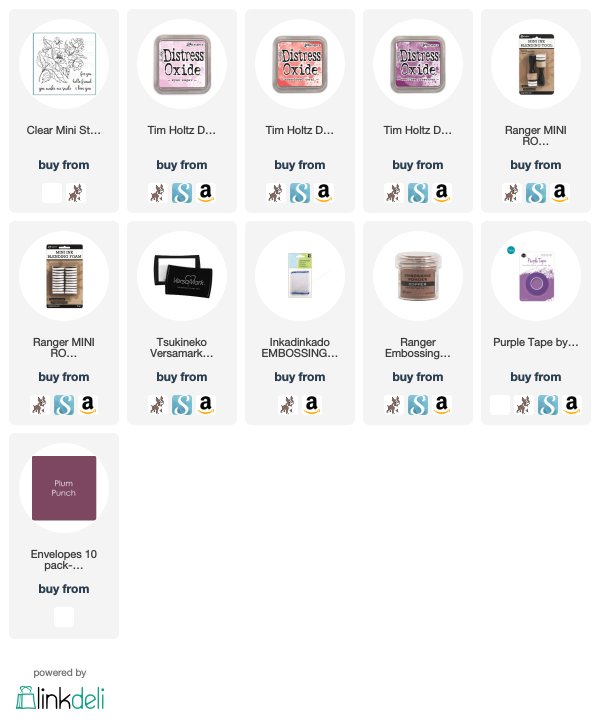
This color palette has become my fall obsession. You know what? It honestly makes card-making that much easier, because there is no need to think about colors, just use them in different ways. Plus, I love how this gorgeous floral image from Gina K Designs can look like fall with a use of color!

After heat embossing the image with copper embossing powder, I began to ink the background with Distress Oxide Inks. You need these inks. Truly. I never get too excited about products, but these are fantastic! Smooth, with a soft finish, plus all the good properties about dry inks also!

Once the background was inked, I used a water brush and lifted the color off the inside of the image. It helped make it pop off the background, but kept it all monochromatic and subtle.
When I put my cardstock panel down to ink it, I used some Therm O Web purple tape. Of course the ink didn't go under there, so I had some white spots left. I originally had planned on cutting the edges away, but when I saw the look, I decided to embrace it. The background looked like it had come off some artist's palette. Something about it spoke to me. To tie the image with those edges, I found some washi tape with a similiar floral motif and the same metallic color. I love it. Would you ever try that?
Thanks for popping in friends! If you would like a closer look at this card, and its coordinating envelope, visit me on Instagram. You can find me @kimberlystamps or by using the link on the right side of my blog. 

Now the REALLY good stuff:
In celebration of this anniversary, we have several amazing sponsors. Let’s thank them for their generosity! Winners will be randomly selected from comments left on all the blogs. The winners will be announced by Wednesday, September 5 on this page. Winners will have up to 2 weeks to contact Rubeena at ararerubycrafts@gmail.com to claim their prize before another winner is selected.
Studio Katia - $50 gift card
Hello Bluebird - $50 gift card
Altenew - $50 Gift card
Pinkfresh Studio - $30 gift card
Gina K. Designs - $50 gift card
Clearly Besotted - £25 gift card
Simon Says Stamp - $25 gift card
Spellbinders Card Kit ($55 value).
Jennifer McGuire - $50 Simon Says Stamp gift card
Winnie & Walter, LLC - $40 gift card
Mama Elephant - $25 gift card
Hero Arts - $25 gift card
Nichol Spohr LLC - Custom-sewn rainbow pencil case filled with brand new Spellbinders dies
Danielle Flynn - $25 Simon Says Stamp gift card
Picket Fence Studios - four $25 gift cards
Ellen Hutson - two $25 gift cards  
Pretty Pink Posh - two $30 gift cards
The Stamp Market - July 2018 Release (estimated $100 value)
Indigojade Art Shop - $50 gift card to Art Prints & Gifts Shop
Flora & Fauna - a 4x6 stamp set
Waffle Flower - $25 gift card
Power Poppy - $50 gift card

After you leave a comment here, hop off to Lisa Hetrick's blog next and continue the eye candy!

Sincerely Yours,


Supplies with affiliate links:

Tuesday, May 8, 2018

7 unique way to use a stencil for card making - Video Tutorial

One stencil, that is all it took to create these 7 unique and different cards. Pretty amazing what you can create with one awesome tool like a stencil! I fell in love with the Art Stencil Floral from Gina K Designs and I had more fun playing with it! So, I made a video tutorial for you on all the techniques I used. Each card has its own section in the video that is quick and short, but hopefully inspires you to give a few of these cool looks a try! 


For those who would like to watch this video in HD, or for those who are reading this via a reader or an email, please click here: 7 Unique Ways to Use a Stencil for Card Making

First up, color pencil. This one doesn't need much explaining, Simply color and add details!
This card above is embossing with highlights from wax paste! 

Gold foiling on clear transparencies? How elegant is this?! Special products from Therm O Web create this amazing look! All the supplies used are listed below.

Light modeling paste and the fabulous new ink colors from Gina K Designs. So easy, and so much pop! After adding the ink, I trimmed the image away from the cardstock it was upon for even more impact.

Copper metallic paste on navy blue paper. Stunning! And easy! Look at all the texture it creates.

The two-tone watercolor technique makes another appearance. Of course this could be done with basic watercolors as well, but why not add a twist for even more beauty?!

And finally, the basic inking technique. Nothing wrong with good, old-fashioned, perfection on a card! I hope you enjoy the video and reference for ideas for the next time you grab a stencil and start creating a card!

Sincerely Yours,


Tuesday, April 17, 2018

two-tone watercolor blending video tutorial - its magic!

This magical watercolor effect on these hearts is created with Peerless Watercolors and a water brush. Isn't it magical?!? This technique is fun and easy!

Watch the video below to learn about Peerless Watercolors, the water brushes you will need for this technique, and then finally, how to create this look for yourself! 


For those who would like to watch the video in HD, you can click below:

Inside a water brush, I have placed cut-up, small pieces of Peerless water color. Peerless Watercolor is intense water color that has been applied to paper. You can create palettes of the watercolors easily. The color is picked up off the paper with any type of brush.

When the brush is filled with water, the water takes on the color of the paper. This allows your water brush to now become a colored brush. When you pick up a secondary color with the brush, you can easily create magical-looking blends. For examples of the colors in the brushes, and the blending combinations, be sure and watch the video above.

You can create large ombre images like the hearts from the Gina K Designs stamp set, Geo Thanks. Or, you can create smaller images with the same magic effect! By picking up a smaller amount of color on the brush tip, the smaller images are a breeze to color. Keep in mind that Peerless Watercolors are truly intense. They will also dry darker.

This is so much fun! I have had my Peerless filled brushes for over a year and I love them each time I take them out to play! Have fun creating two-tone magic on your next card!

Sincerely Yours,


Monday, December 6, 2010

12 Trendy Days of Christmas Day Eight: Heirloom Ornaments

Print

Check out these inspiring friends and their projects today:

Ornament 1

Photo by me, taken at Target

Heirloom Ornament

The look of “heirloom” ornaments is everywhere, thanks to Spellbinders Heirloom Ornament 2010. The die template is absolutely stunning. And it gets even better! Gina K has a set of stamps that fits perfectly inside the die cut shape! Isn’t that image stunning? It was stamped onto cardstock and heat embossed with clear powder. Then I rubbed Distressing Ink over the surface. Using a small piece of low-tack tape, I then die cut the image.

Do you have ornaments that you have collected? Do these ornaments inspire you? I would love to see what you have been creating! Leave a link in the comments, so I can stop by! thanks for stopping by!

Supplies: Spellbinders-Heirloom Ornament, Stamps-Gina K (Heirloom Ornament stamps designed by Nina Brackett), Patterned paper-Basic Grey (Jovial 6x6), Ink-Ranger (Distressing-Vintage Photo, Peeled Paint), Tsukineko (Versamark Watermark), Embossing Powder-Stampendous (Clear Detail), Twine-May Arts, Brad-Kaiser Craft

In case you have been missing out:

Friday, November 19, 2010

Spellbinders Holiday Hoppin’ Blog Hop

Holiday-Hoppin-Blinkie

Welcome to the first day of the Spellbinders™ Paper Arts Holiday Hoppin’ Blog Hop! Spellbinders, along with Spellbinders are showcasing their newest products just in time for your Holiday crafting and gift giving. Lots of creative ideas are in store, as well as prizes galore! Each participating company has generously donated towards the prize package listed on the Spellbinders Blog. A total of two identical prize packages, one for each day, November 18 and 19 will be given away! To enter, just leave a comment on a participating blog! Comments in the first 48 hours of the post are eligible. One commenter each day will be randomly selected as the winner. Winners will be announced on November 22, on the Spellbinders Blog!

Be sure to see all of yesterday’s Holiday Hoppin’ blogs for inspiring projects and another chance to win!

Mona Pendleton

Gina Hanson

Deborah Young

Becca Feeken

Julie Overby

Kimberly Crawford

AJ Otto

Margie Higuchi

Beth Pingry

Jennifer Holmes

Kerry Urbatch

Shona Erlenborn

Tammy Inman

Jessica Turner

Brenda Hurd

Julie Koerber

Rae Barthel

Rachel O’Crowley

Kellie Fortin

Kristen Cohen

Joy Dickson

Candy Rosenberg

Laura Craigie

Stephanie Hester

Leesa Crutcher

Nina Brackett

Today I am using Spellbinders S4-294 Beaded Ovals die template

S4-294-BEADED-OVALS

Here is a video tutorial on how to cut and emboss with the Spellbinders Grand Calibur

:

Smitten for Mittens

For today’s project, I also used products from the Rusted Sun Collection from Fancy Pants, and a new set of stamps from Gina K, called, Winter Mittens. I thought all together they would make a darling mitten hanger for an entryway! (This project measures 9x12”.)

CU oval stamping

I die cut/embossed three Beaded Ovals from cardstock. Then distressing ink was applied over the top, to bring out the embossing. I used the same ink to stamp the snowflakes both on the ovals and the patterned paper.

By adding the snowflakes and the distressing ink, I was able to take a summer collection of patterned papers and turn them into something wintery! How great to get extra mileage out of your papers with that easy technique!

CU Clothespin with Oval

Here is another look at the ovals, this one with the clothespin.

CU mittens

A little look at the stamped pair of mittens that I attached to the clothespins. Let’s face it, I just wasn’t quite ready to hang “real” mittens. And, if you live somewhere you don’t need mittens, then these stamped ones are perfect! :)

Now for the winning!!

Simply leave a comment on my blog to be eligible to win the Spellbinders Holiday Hoppin’ Prize Package. One winner will be chosen from all the comments on all the blogs participating today. Comments made in the first 48 hours of this post will be eligible to win. Winner’s names will be published on the Spellbinders Blog on November 22, and they will have 48 hours to reply to Spellbinders to claim the prizes.

thanks for stopping by!

Supplies: Spellbinders-S4-294 Beaded Ovals, S4-285 Nested Mittens, Patterned paper-Fancy Pants (Rusted Sun-Pool Party, Petals in the Sand), Letter stickers-Fancy pants, Trim-Fancy Pants, Button-Fancy PantsStamps-Gina K (Winter Mittens), Ink-Ranger (Distressing Ink-Frayed Burlap, Broken China, Dusty Concord), Wood plaque-Michael’s, Clothespins-Local hardware store

Related Posts Plugin for WordPress, Blogger...