Showing posts with label Gold Foiling. Show all posts

Monday, January 6, 2020

WRMK Design Team 2020 Announcement and Gold Foiling!

Stop over to my Instagram account (@kimberlystamps) and watch how I gold foil my name and the year on this sweet little sketchbook! Using the We R Memory Keepers Foil Quill Freestyle Pen you can foil just about anything! Its so much fun and so easy to use! 
I am also thrilled and honored to announce that I will be staying with the WRMK design team for another year! This is the start of my 5th year! Hard to believe! I love the innovative designs and the people I get to work for and with at this company! I cannot wait to share with you all the wonderful new tools headed your way!

Sincerely Yours,
Supplies used on journal. Using my affiliate links is so appreciated! Thank you for supporting my family and me in this way!

Monday, December 30, 2019

Happy New Year! Quick and Easy Party Favors with the We R Memory Keepers Foil Quill

Happy New Year! May 2020 be filled with joy and happiness for you and your family! 

One of my all-time favorite treats is Moose Munch from Harry & David's. Especially the dark chocolate version! Its a special treat that I get once, maybe twice a year. After I found some at my local grocery store, I knew it would also be perfect to use for a great New Year celebration party favor! Crafting and chocolate snacks? Does it get any better? I mean really? :D
To start with, I typed my words out into the software of my Silhouette Cameo digital cutting machine. While I was formatting the type, I plugged the We R Memory Keepers Foil Quill into a USB power source and placed it in the pen tool slot on my Cameo. (I have version 3, with two tool holders.) Once the wording was formatted, I sent the image to the Silhouette and the Foil Quill performed its magic! 

When adding the foil to the top of your cardstock, use washi tape to hold it in place. The foil also needs to be as flat as possible on the paper for the best results.
After the foiling was complete, I used the WRMK Tag Punch Board to create tags. When using this tool, I always test a scrap piece of paper first, to check the angles on the top.
The Tag Punch Board also helps you punch a hole. Using the lines, you can perfectly center the hole.
I filled decorative treat bags from Michael's with the popcorn and closed the bags with a twist-tie. Then I wrapped ribbon around the bag closure. Both ends of the ribbon were passed through the tag hole and tied tightly around the bag in a bow.
To add more bling, I punched gold glitter paper with a WRMK Clear Cut Punch. It added some fun bling. In fact, I should have added more stars! 
The straight ribbon ends seemed kind of blah to me. To add some curl (to my wired ribbon) I wrapped it around my stylus tool. How cute is that?
Fun, easy, quick, sparkly, and tasty. Seems like one fabulous party treat for New Years Eve or New Years Day! For more details, visit the We R Memory Keepers Blog for my post.

Sincerely Yours,
Supplies: Affiliate Links used. Thank you for supporting me and my family this way!
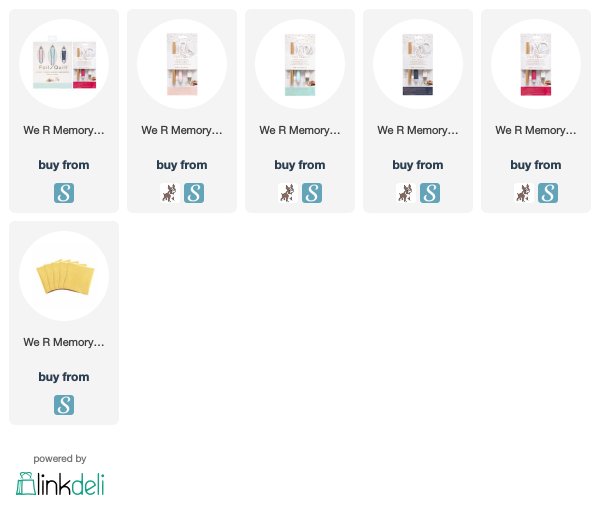
Thursday, November 28, 2019

Happy Thanksgiving! Handmade Napkin Rings tutorial

Happy Thanksgiving! I wish you and yours so much love and happiness this entire holiday season!

Since we moved far from family almost 10 years ago, my parents have been coming to our house for  Thanksgiving. We love hosting them and having them here. And we also love to cook and entertain. Each year I try and add a special touch to the Thanksgiving table. I always feel like making something adds love and warmth  to the table that you cannot find in a store.

This year, I added a simple wooden tag to the napkins using the We R Memory Keepers new Singe Quill and the Freestyle Pen. Both great tools that make quick work of making something special and heartfelt. Visit the We R Memory Keepers blog after your meal and enjoy adding this idea to your plans for next year!

Sincerely Yours,
Supplies used. Shared with affiliate links. Thank you for supporting my family with your purchases.

Singe Quill:


Foil Quill Freestyle Pen:

Monday, April 15, 2019

We R Memory Keepers Foil Quill and Water color Tutorial

The We R Memory Keepers Foil Quill is one hot tool! And its no wonder, with the Foil Quill being compatible with so many digital die cutting machines! Once you try it, you will get "foil fever!" Meaning, you will be trying to foil everything! Which is where I found myself when thinking about my design team assignment this month...

Being also currently obsessed with watercolor, the idea struck me to foil watercolor paper and then watercolor in my images! Which is a PERFECT use for the open images that are contained in all the digital drives available for the Foil Quill!

I combined these images and alphabet from Paige Evans on this card, creating a lovely spring card that measures 5x7.

Head over to the We R Memory Keepers blog for a tutorial, tips, and tricks, and more looks at the card. And if you want to REALLY see all the shine, head to Instagram, find me @kimberlystamps, and check out my stories!

Sincerely Yours,
Supplies used. Affiliate links also used.

Tuesday, May 8, 2018

7 unique way to use a stencil for card making - Video Tutorial

One stencil, that is all it took to create these 7 unique and different cards. Pretty amazing what you can create with one awesome tool like a stencil! I fell in love with the Art Stencil Floral from Gina K Designs and I had more fun playing with it! So, I made a video tutorial for you on all the techniques I used. Each card has its own section in the video that is quick and short, but hopefully inspires you to give a few of these cool looks a try! 


For those who would like to watch this video in HD, or for those who are reading this via a reader or an email, please click here: 7 Unique Ways to Use a Stencil for Card Making

First up, color pencil. This one doesn't need much explaining, Simply color and add details!
This card above is embossing with highlights from wax paste! 

Gold foiling on clear transparencies? How elegant is this?! Special products from Therm O Web create this amazing look! All the supplies used are listed below.

Light modeling paste and the fabulous new ink colors from Gina K Designs. So easy, and so much pop! After adding the ink, I trimmed the image away from the cardstock it was upon for even more impact.

Copper metallic paste on navy blue paper. Stunning! And easy! Look at all the texture it creates.

The two-tone watercolor technique makes another appearance. Of course this could be done with basic watercolors as well, but why not add a twist for even more beauty?!

And finally, the basic inking technique. Nothing wrong with good, old-fashioned, perfection on a card! I hope you enjoy the video and reference for ideas for the next time you grab a stencil and start creating a card!

Sincerely Yours,


Monday, September 4, 2017

gold foiled sentiment with a glue pen video tutorial


Hello everyone! Happy September! I am sure you are all back in the school swing of things! Who is ready to head back into their crafty space and start creating again?! I have a super easy idea for you today to get your mojo flowing!


I made this sentiment gold foiled without heat or a glue pad! No, really! I did it with a stamp, a glue pen, and some Nuvo gilding flakes! All supplies contained in my Modern + Marbled kit!

By using the stamp as guidelines for my glue pen, I can easily turn any sentiment shimmery! Best part about this technique is, the card is truly flat! No bulk, and easy to mail!!


This video shows you just how easy it is to create this look yourself. And I show how to make some pretty eye-catching envelopes as well! Because every card needs a beautiful and coordinating envelope! 

For a HD version of the video, please click here: Gold Foiled Sentiment With a Glue Pen
Clicking the link will allow my email readers watch the video as well.
Otherwise, click the arrow above to watch.


Sincerely Yours,

Thursday, July 6, 2017

Modern + Marbled - Gilding Flakes 2 Ways


I have to admit, while I love that marble stamp image, the gold gilding flakes are really cool! Check out two different ways that I used the flakes on this card.


How classy is this? Its so elegant. This would even be perfect to send to a man!


One the background, I stamped the marble image two ways. First, I inked the back of the stamp up (the puddle) with Soft Stone ink. Three mists of water were squirted on the image and then it was stamped on to watercolor paper. The second stamping was "right side up" with Smokey Shadow ink. I like the extra depth that was added to the image.

To take it one step farther, once both inks were dry, I followed the lines of the image with the glue pen. Once the glue changed from pale blue to milky white, I added the flakes. A stiff brush was used in a circular motion to get the flakes to adhere and to remove the excess. For a video tutorial, check out this post:


One more place to use the gilding flakes, on the die cut shapes. I cut the largest hexagon from white card stock. Then, I used the glue like a marker and "colored" the bottom of the hexagon. The gilding flakes were applied the same way as the background. How beautiful is that look?

Ways to use gilding flakes:
1. Highlight portions of the marble image.
2. Cover parts or all of the die cut hexagons.
3. Cover parts or all of the die cut words.
4. Accent the edges of die cut hexagons.
5. Accent the edges of the envelopes.

I am thinking that I needed to change the title of this post to more than 2 ways! Looking forward to seeing what you create! Make sure and use the hashtag #sincerelyyourspti on Instagram, along with #papertreyink so we can find your gorgeous work!

The Modern + Marbled kit can be found in the Papertrey Ink online store. Click the link for direct access.

sincerely yours,

Monday, July 3, 2017

Modern + Marbled - geometric look


This card perfectly blends the look I was desiring for Modern + Marbled.


As the ideas for how to create the geometric look were discussed, Nichole suggested a stamp in a straight line. It would let imaginations run wild. It was a brilliant idea! Not only can the straight line image create cool effects like this on the hexagon images, but can also create stripes, and more!

After die cutting the largest hexagon from white paper, I stamped the straight line image with watermark ink. Gold embossing powder was applied and heat set. Using Post-It notes, I masked off the smaller portions. Then the marble image was stamped in Soft Stone ink.


Inside the other portions of the hexagon, I water colored by using the stamp pads as ink. I pressed the Soft Stone and Smokey Shadow inks into an acrylic block.Using a water brush, I colored the other parts. Thanks to the heat embossing, the colors did not bleed into the wrong section.

The card was finished off with gilded words again. When something works, run with it! :D

To purchase the kits, click each item below:

Modern + Marbled Kit

Modern + Marbled Color Basics Add-On Kit

sincerely yours,

Related Posts Plugin for WordPress, Blogger...