Showing posts with label sequins. Show all posts

Wednesday, July 17, 2019

simple and sweet shaker cards with WRMK Clear Cut Punch Mini

Ahhh, summertime. Warm temps, days at the pool, late nights chasing lightning bugs and toasting marshmallows...and you need a card for tomorrow?!?!? 

Hang on, no worries, once again We R Memory Keepers has a tool that will make quick, adorable, and even interactive cards in minutes! Say hello to the Mini Clear Cut Punch! Clear Cut Punches allow you to see what you are punching. Like an image? A letter? A part of your patterned paper? No problem, cut it away easily with this magnetic punch! A follow-up to the regular-sized punches, these Mini Clear Cut Punches are fun for card-making!

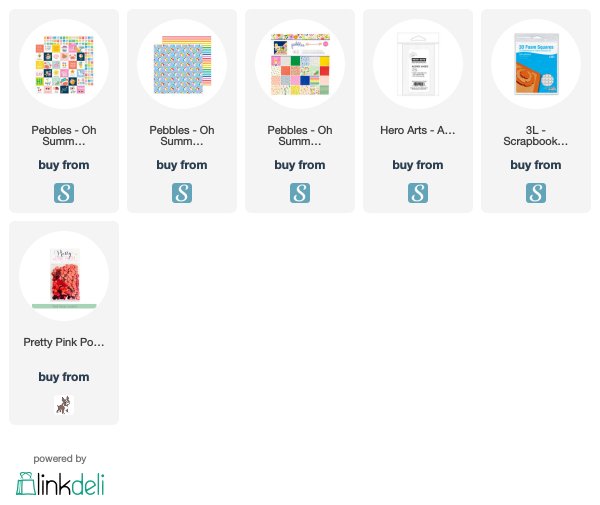
Matching my punches up with these super sweet papers from Pebbles, made for quick and easy shaker cards. So easy, you can include the kiddos in the process. Which, is always wonderful!

Check out the full tutorial on the We R Memory Keepers Blog and if you want to see more about the punches and how they work, pop on over and visit my Stories on Instagram. You can find me @kimberlystamps .

Sincerely Yours,
Supplies. Listed with affiliate links. Thank you for supporting my family this way!

Tuesday, September 25, 2018

Spellbinders Holiday Die D-Lites - negative die cut piece ideas

What is the first thing you do when you get a new set of dies? For me, after I rip them open in excitement, I immediately cut the images out. I love seeing how the images work together, how they layer, the size, the embossed detail...as you can see, I love me some good die cut images! When I got the new Spellbinders Holiday Die D-Lites Christmas Tree set, something surprising immediately struck me.

I had ideas for how I wanted to use the trees as soon as I saw the package, but when I cut them out, those ideas went right out the window! Because when I saw the left-over portion, or the negative pieces left behind, woweeeee! The "junk" was just as beautiful. New ideas sprang to mind and I got to work creating. 

I cut the basic image from a panel of cardstock that I trimmed down to size. Layered behind it is a piece of gold glitter cardstock. How simple, yet elegant is that?!!?

I added a few stamped stars on the card base, a sentiment, and used the star from the die set to finish the card off. Now I didn't toss the "real" pieces, I have set those aside to make another card. Its a two-for-one! How's that for making quick work of your holiday cards?!?

When you have an opening as perfect as this, you create a shaker card! I mean, come on! How could you not?! 

Behind the opening, on the card base, I did use some of the "real" images. The star and the tree trunk looked awesome behind the shaker sequins and added to the detail. Its like my Christmas tree is all lit up and sparkly! Be sure and visit the Spellbinders blog to read more about how I created these cards!

Sincerely Yours,
Supplies, affiliate links used:

Monday, October 3, 2016

My Monthly Hero Kit October 2016

I am so honored to be hopping along with some crazy talented card makers today sharing the latest kit from Hero Arts! My Monthly Hero is a kit packed with goodies to make amazing cards and this month, its packed with shaker card awesomeness! This is a limited edition kit, so when its gone, its gone! You can purchase the kit by clicking here: My Monthly Hero October 2016.

The kit contains:
► A 4"x6" clear stamp set
► Dies for creating a snowglobe, snowdrifts and other background elements
► Seven coordinating Frame Cuts dies to match the stamp set
► Three pigment ink cubes in White, Silver and Baby Blue
► Eight White Cards and Envelopes
► Polar White Flower Soft
► Buttons Galore Shaker Mix
► Acetate Sheets in 4"x4.5" (7) and 4"x6" (1) for creating a shaker card
► Light Blue Gemstones


The kit includes dies to create snow globes. How perfect for Christmas cards! I began by cutting my light blue card stock with the globe top. To create the starry background, I used an add-on die to create a stencil by die cutting card stock with Star Confetti Fancy Die. Once the paper was cut, I was able to ink through it with a mini ink blending tool. Its a great way to stretch the use of your dies!

Behind the globe, on my card base, I inked a dark blue background, to create a night sky. The snow falling was created by stamping white pigment ink with the snow image from the My Monthly Hero stamp set.

I backed the entire panel with acetate then added foam adhesive around the opening and along the sides, knowing that I would be making a shaker card. (The foam adhesive around the opening is to create a well for the shaker items to move freely, and to stay inside the card. Its also added to the sides of the panel, to keep the top layer of card stock propped up without bending.)


To create the landscape, I used Snowdrifts Fancy Dies. This set of three dies is another add-on that can be purchased to coordinate with the kit. I love the layers of trees, trees and a house, and trees, a house and a little snowman! (Look very closely to find him.) I cut each of the die images from a piece of card stock. Keep in mind that these dies are unique in that they only cut the top of the image. Reason being that they allow you to control the length of the image. You could use these as the top of a card stock panel on your card, without the globe! So clever. (and wait, off to make a card with just that...)

I colored the tops of the scenery with Distress Markers and staggered the layers. Once I was happy with the placement, I adhered those layers to the card base. I poured some of the sequin seed bead mix onto my scenery. The top layer of the card was fastened over the top. To finish off the card, I added the base of the snow globe, colored with Copics and stamped with a sentiment. A bow was added also. And my absolute favorite part of the card is the Santa and his reindeer image! What is more magical than that?!


For this card, I went much simpler. This card would be easy to mass produce for your Christmas cards this season! To start off, I embossed a panel of white card stock with Circle Confetti Fancy Die. Yep, you read that correctly, I embossed with a die! I placed my card stock onto the die (cut edges up), topped that with an embossing pad, then passed it through my manual die cutting machine. How cool is that?! Then I die cut the same globe circle from the panel. Acetate and foam were added to the back of this panel, to make another shaker card.


For the inside layers, I used the scenery dies from the My Monthly Hero kit. They work the same as the add-on dies, but simpler in look. I cut the trees from a green card stock and a snowbank from light blue card stock. Those layers were trimmed to size and adhered to the dark blue card base. A sentiment was heat embossed in white on the card base. The sequin and bead mix were poured over the scene and finally, the top layer was adhered.

Using the third snowbank in the set of dies from the kit, piece of card stock that had double-sided adhesive on it was die cut. Once I cut it, I removed the backing, exposed the adhesive, and then poured glitter over the entire surface. It makes for a beautiful, snowy, and sparkly addition! It was adhered in front of the globe opening, along with a few more sequins.


Check out what these amazing ladies did with the kit:

What is a blog hop without a chance to win?! Here is your chance to win the My Monthly Hero Kit for October 2016! Leave a comment on my blog and all the others. One lucky commenter will win! Good luck!

thanks for stopping by!

kimberly

Friday, January 15, 2016

Pretty Pink Posh Turns 2 Celebration!


Happiest of birthdays to Pretty Pink Posh! Its so wonderful when nice people, who work hard, have success! That's why I am so honored to be helping Paulina celebrate such a fun milestone! Here is to many, many more birthday celebrations!!


First of all, when you have gorgeous sequins, you HAVE to make a shaker card! So I knew that the new dies from Pretty Pink Posh, Scallop Frames, would make an amazing background. I love the scallops on the inside. It makes for an adorable frame. The stitching lines around the outside edge finish it off perfectly. I cut the frame die twice from Sweet Tooth card stock. On the first Pretty Pink Posh Scallop Frame, I adhered a piece of acetate. Then added foam tape around the outside edge of the second Pretty Pink Posh Scallop Frame. I layered the two together to create the front of the shaker.


As I was thinking about what to put on this large shaker background, I looked at the die set, 
Pretty Pink Posh Twine and Bows. To me, they looked like the strings on balloons, and this birthday card was born! To the Pretty Pink Posh Twine and Bows I added die cut and stamped balloons. I adhered them directly to the top layer of the shaker.


On the card base, I inked an ombre background of Summer Splash ink. Then I placed a mix of sequins on the card base. I used most of the sequins from the Pretty Pink Posh Share Kindness mix. I pulled the lovely green ones out to fit my color palette. 

Side note, the Pretty Pink Posh Share Kindness mix is a special one as all the sales from the set will go to the Kind Campaign during the month of January. Love that!


Looking at the dies, Pretty Pink Posh Stitched Tabs, I thought of making a shaker file folder. Top secret and all. :D


 To create the file folder, I die cut a card base of In the Buff card stock with one of the borders from Pretty Pink Posh Stitched Tabs. Then, using a score tool, I created a larger base, one that would hold my shaker on the inside. Its about 1/4 of an inch thick. If you want to make one of these yourself, place your foam tape inside the file folder and measure for the exact scoring size. 

Pretty Pink Posh Twine and Bows was the perfect way to "close" the folder too! I cut Electric Red card stock with the dies. Then I adhered the strings around the top and bottom to add more realism.


For the inside, I again cut Pretty Pink Posh Scallop Frames, added acetate and foam to the back. (Be sure and do it in that order, I may or may not have done it wrong, once or twice...) 


On the file, after stamping the sentiment, I added die cut letters and hearts along with the very cool Pretty Pink Posh Droplets! I used the 4mm Droplets inside this shaker. I love them! I have many plans for these clear, raised, spots! The shaker top was then adhered to the center of the file folder.


Visit the Pretty Pink Posh blog for chances to win great prizes! Plus, there are three days of projects! Get linked up to some amazing designers! I cannot wait to see their gorgeous creations!!!
Be sure and leave comments on the blogs of the designers, as winners will also be chosen from comments left! So many chances to win!!

thanks for stopping by!

kimberly

Supplies for Happy Birthday card:


Supplies for Sending You Love card:

Related Posts Plugin for WordPress, Blogger...