Showing posts with label Chalkboard. Show all posts

Friday, October 12, 2018

Sending Joy - chalkboard card and ornament

Welcome back! I must again start my post with a huge thank you! So many messages and sweet comments left every where about Sending Joy. They are so sweet and thoughtful, my heart is totally touched and full! 

The wreath look from my first day's card was still with me, but I wanted to change it up. The final scene in White Christmas (one of my favorite Christmas movies of all-time) features silver and red. There is something chic and retro about that color palette. So I used it on this card. I stamped the pine branch image with white ink on black card stock.

After stamping the berries, I used a Quickie glue pen to fill in the circles. I poured red glitter (gasp, glitter again) over the top. To tie in the berries, I layered a piece of silver glitter cardstock underneath the black panel. Chic and fun!

Now about those ornaments I talked about earlier this week. These ornaments are so easy, you will be able to make enough to fill your tree this year! These chalkboard black ornaments are kind of flat, not entirely, but they are certainly not a sphere.I picked these up at a big box craft store on clearance at the end of last year. 

Stamping on a rounded surface can be tricky. I attempted to stamp with the image on a block, but the rolling motion was too complicated and didn't leave a good image behind. So I had an idea...photo polymer stamps are flexible...what if I didn't use the block...?

I inked up the image (with an ink made for surfaces like this) and picked it up with my hand. I placed it down on the ornament and gently pushed it onto the ornament surface. And look! It worked really, really well! 

To add more Christmas to the ornament, I stamped and die cut images from Sending Joy. The coordinating dies have a slight edge around the stamped part, bringing a nice finishing touch. And that star? More about that tomorrow! I do love me some red and black buffalo check!!!


See you again tomorrow. Hopefully I can sneak some good creative time tomorrow. If not, it will be because my parents are here for a visit. It is wonderful to have them here, as they live a long way away. My heart could burst with happiness today!

P.S. Can Stephanie Clapper please email me? You asked me a super question and I cannot find a way to reach you! :D You can click the link on the right side of my blog to email me. Thanks!

Sincerely Yours,
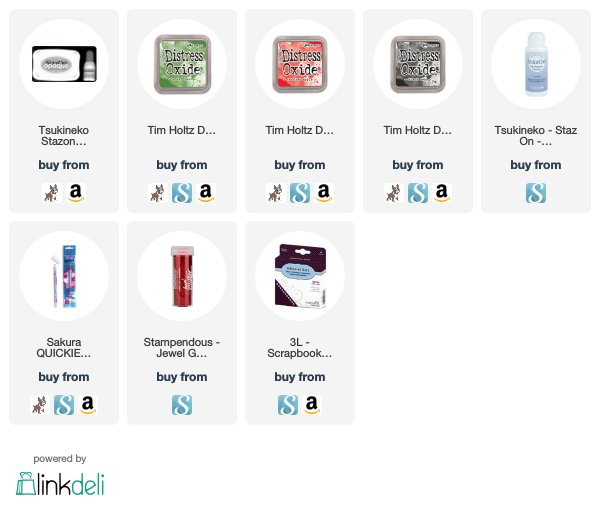
Supplies. Affiliate links used. List will be updated when products are available on Oct. 15.

Wednesday, March 25, 2015

chalkboard wall art with digital cut files


My love for anything and all things chalkboard is no secret. Combine that with my love of using paper crafting to create home decor projects, and you have this gorgeous wall hanging that is over on the Carta Bella Blog. There is a complete tutorial there. And its easy. So easy. Check it out!

thanks for stopping by! and for visiting the Carta Bella Blog!

~kimberly

Friday, January 2, 2015

so much love: MFT January Release Countdown


Welcome to this month's Release Countdown with My Favorite Things! You will find complete details each day on the MFT Blog, including how you can win prizes and full reveals of featured products.

My love for chalkboards is hardly a secret. Any chance I get to create a small project using a chalkboard, I get all giddy! When I saw Stencil Love, I wanted to create some type of artwork with it, a piece of decor or wall hanging. Mix those two thoughts together and you get today's first project!

I began by placing Stencil Love onto my small, slate chalkboard. This slate is about 4x6." I used a chalk pencil to trace inside the lines of the stencil. 

Once the outlines of the four elements from Stencil Love were complete, I colored the insides in with a standard piece of chalk.

How cool is this?! I am digging through my stash later today to see what other stencils I can try this technique with!

My second card utilizes another stencil being released this month, Stencil Background Hearts. Keep reading for a quick tutorial on how to create this multi-colored background. (Which was totally inspired by my bedroom as a young girl. I had wallpaper in this pattern and also the same colors!. :))

I trimmed my Sweet Tooth cardstock panel down to size and then adhered it to my work surface. Then I lined up my Stencil Background Hearts on the cardstock panel and adhered it to my table. I do this so things don't slide around while I am working.

I grabbed my favorite ink colors (they will all be listed below) and my Mini Ink Blending tool and Foam Pads. These mini blenders are awesome for any type of inking, but even better for inking smaller spaces like these hearts!

Place your foam pad into your ink pad several times to pick up the ink. Test it on a scratch piece of paper to get the feel for it the first time you use these.

Then using a circular motion, apply the ink to the paper. You will notice in the photo, I have placed post-it notes around the heart I am inking, this is to avoid inking over in places 
I do not want ink to be.

Watch this quick video below to see how easy applying the ink to paper is!


Here are all the hearts inked up. It makes me happy to see all these bright hearts!

I finished off the card with two die cut images. I cut Die-namics Straight to My Heart from Sweet Tooth cardstock. The words true love are also on an arrow, like the heart. But it didn't work on my card, so I trimmed away the ends and the tops and I am thrilled with how it turned out!

As always, head to the MFT Blog for more information and details. There is a look at the new colors and wonderful videos that show you the new products in action! 

thanks for stopping by!

~kimberly

Supplies for Love Chalkboard, available Jan.6:


Supplies for True Love Hearts card, available Jan. 6:

Friday, November 21, 2014

simple handmade Christmas tree ornaments


Hi everyone! I am so ready to start decorating for Christmas! Stop on over to the Maya Road blog to check out my easy-to-create, but awfully cute star chalkboard ornaments!

thanks for stopping by! and thanks for visiting the other blog-that means a lot!

~kimberly

Wednesday, December 11, 2013

chalkboard ornaments

all is calm ornament by Kimberly Crawford

Happy mid-week! How are all of your holiday preparations going? Anyone as behind as I am? Please tell me I am not alone. :) We did manage to get one of the trees up this past weekend. Hubby likes to call it my department store tree. And the little man calls it the fake tree. (The "real" one being down in the lower living room with all the personal ornaments. LOL) Anyways, for my designer tree, I have been wanting to create mini chalkboards. (shock, I know). After some playing around, I came up with these!

joy to the world ornament by Kimberly Crawford

While scrolling through the Silhouette Online Store, I stumbled across these sketch files. Not cut files. These files are drawn using special pens made for the machine. The font is just so cute, I knew it would work perfectly! The chalkboard portion is plain black cardstock that has been "sketched" with a silver Silhouette pen. I die cut the cardstock after sketching with a Technique Tuesday die template. The finished ornaments measure 3x4. I am looking forward to making more to fill up the tree!

Fun news: Today I am guest posting over at Moxie Fab World. Stop on over and check out one of the trends I am following these days. And check out all the guest posters. Its been a lot of amazing eye candy over there!!

thanks for stopping by!

~kimberly


Wednesday, October 2, 2013

chalkboard easel and more

chalkboard easel by Kimberly Crawford

On a recent Hobby Lobby shopping trip, I found this chalkboard easel. And you know how much I love chalkboards! There were a couple of sizes, this one at about 5x7, but not quite, and a smaller one at 3x4. I couldn't wait to get playing with them, so I took time yesterday afternoon and am thrilled with how this one turned out!

chalkboard easel cu 2 by Kimberly Crawford

With the small space to work with, I wasn't even going to attempt my real chalk technique. I wondered if my Silhouette could cut the white vinyl with the small size, while maintaining the details. And look! I cannot believe how perfectly it cut! (Silhouette file 47133)

It was interesting to lay this out. :) Silhouette does sell a transfer paper, to assist in applying the vinyl, but I did not have any on hand. This will soon be remedied. :) A tweezers helped me place the pieces. And, they were easy to pick up and move around as needed. Honestly, after two or three words, it was no problem.

chalkboard easel cu by Kimberly Crawford

To finish the easel off, I stamped these beautiful flowers and leaves from the new Avery Elle set, Laurels. This new stamp set is pretty and perfect. The real brilliance is the way you can layer the images. Each of the flowers has three layers, allowing you to add beautiful dimension.


JAN 2014 Cover WEBthumb 792x1024 Paper Crafts and Scrapbooking magazine   a sneak peek

And one more thing to share with you today, a peek at the new Paper Crafts & Scrapbooking digital magazine! This is the cover of the January 2014 issue! Ok, time for me to be honest. This has been hard. Knowing that the November/December issue was the final print issue of Paper Crafts Magazine was tough. I have loved the magazine since its beginning in 2004. But, there are some very positive things to come out of this:
  1. MONTHLY inspiration! There will now be monthly issues. Full of amazing inspiration from the best designers in the industry. All in one place. Beautifully photographed. Large photos. Large text.
  2. LINKS! Like that paper? Stamp set? Die template? Supplies will be linked making it easy to find that product that inspires you. Did I mention links to VIDEOS?
  3. SHARING! Tweet. Pin. Facebook. Email. You will have the ability to share so much! And if you really want, you can print the entire issue at home or a copy shop.
  4. No more clutter! Save all your issues on your computer or digital device! (Have I mentioned that I like to throw things away? Sometimes its important things, like, maybe airline tickets...)
  5. SCRAPBOOKING! Many of us dabble in scrapbooking too. I am looking forward to ideas that will inspire me in both hobbies! And even if you don't scrapbook, its still paper ideas.
  6. SPECIAL ISSUES. There will be MONTHLY PRINT special issues. And it looks like there may be the possibility of having those mailed to you...stay tuned.
Change is never easy. It isn't easy for me yet. But I will get there. And I am truly thankful that there will still be a magazine. My beloved magazine. New format. New possibilities. 

thanks for stopping by!

~kimberly

P.S. If you want more details about the changes at Paper Crafts, please check out these couple of blog posts. People who are much better at writing than I. Paper Crafts Connection. Moxie Fab World.

Wednesday, September 4, 2013

fun with chalkboard and cork

Welcome, welcome! Its a fun day here on the old blog and on the Paper Crafts Connection blog! Its my turn to post over there today, so if you haven't been there yet, stop on over, because there are prizes involved!

If you have already been there, then let's get to a few more ideas with some great new products from Fancy Pants! You already saw the fun chalkboard tape on Paper Crafts Connection, but look at the label shapes! And the cork shapes! I just had to put these to work immediately!


first day of school frame by Kimbery Crawford

The chalk and cork screamed back-to-school time to me. And I happened to have an awfully cute photo of the little man that needed a special place. ;) (Thanks to some repositionable adhesive I can change the photo each year.)

first day of school frame cu1 by Kimberly Crawford

The frame is a 5x7 acrylic frame that I picked up for around a dollar. The background is card stock that was embossed with an embossing folder along with a piece of white card stock that was digitally die cut to look like notebook paper.

first day of school frame cu2 by Kimberly Crawford

And the fun part of the frame; this label on the front. Yes, you read that correctly, I adhered the label to the front of the frame. It lets me add some fun dimension. What I liked about the labels and shapes is how well the shapes and sizes all mix and match. You can see here how well the cork circle fits on the chalk label.  

Fun discovery! You can emboss the chalk tape and labels!! The chalk label was embossed with an embossing folder and I rubbed some white ink over the polka dots to bring them out a bit more.

first day of school frame cu3 by Kimberly Crawford

Here is the tape embossed! The star and enamel dot were adhered to the outside of the frame.

Fancy Pants cork arrows card by Kimberly Crawford

Where are the cork pennants? They are not in the product photo? Well, when I was playing with the arrows, I realized that if I cut the point off the arrow, I could have pennants! A pair of scissors cut it easily. I love getting more mileage from great products!

Fancy Pants cork arrows by Kimberly Crawford

Be sure and visit the Paper Crafts Connection blog for a chance to win an awesome prize pack of chalk products from Fancy pants!

thanks a million for stopping by!

~kimberly
Related Posts Plugin for WordPress, Blogger...