Showing posts with label faux postage. Show all posts

Wednesday, November 22, 2017

Envelope Envy: creating custom faux postage and seals


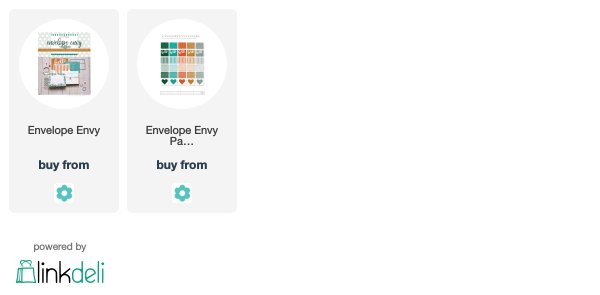
Envelope Envy is now available for purchase at PapertreyInk.com!

I know you are as excited about this innovative kit as I am! And I cannot wait to see what you create with it! Be sure and tag Papertrey Ink or myself, and use the hastag #EnvelopeEnvy on social media! Or, if you don't use social media, send me an email, because I would truly love to see what you are creating!


Today's suite highlights the patterned papers and the dies. While these envelopes look like they took a long time to create, with the products in Envelope Envy, it will not take long at all!

The front of the envelope was stamped with the striped image down the side, the three-lined address stamp, and a heart. Quick, easy, and adorable!


Very often, I give my cards to people by hand, or they are included in a gift bag, or even a package I send. Adding this fun faux postage stamp to my envelopes is a thoughtful touch! I started by die cutting the white sticker paper included in the kit. I stamped two of the small hearts on the paper. Then, masking off the rest of the sentiment, I inked up the word love, and stamped over the hearts. So cute!

I lined the envelope using the large heart patterned paper. The heart will not show in its entirety and that is the intention of the design. The most important part will show when you have a card inside and when the recipient opens it.


For the envelope flap, on the back, I added a piece of polka dotted patterned paper. I placed the envelope flap on the back of the paper and traced it with a pencil. With three quick cuts by my scissors, I had the perfect piece to cover the flap. One of the sentiments from the stamp set was added along the bottom of the flap. 

To close things up, I cut a piece of the Luxe Gold Sticker sheet with the heart die. How sweet is that little seal?!


How I love all these extra special touches that can easily be added to envelopes! :D


Sincerely Yours,

Wednesday, November 1, 2017

Introducing Envelope Envy


I could not be happier today! Today is the day that I get to introduce my latest kit with Papertrey Ink called, Envelope Envy. This kit is above and beyond what I imagined! 

"Envelope Envy has the stamps, dies, stencils, and papers to help make your envelopes beautiful! In fact, your cards might start to get jealous! Envelope Envy Happy Mail stamp set contains 15 images to adorn your envelopes. The large flower border will look beautiful on the envelope flap, or stamped over the address line image. No more crooked addressing with that three-line image. Add heartfelt sentiments anywhere on your envelope with the 6 sentiments. The largest sentiment also fits perfectly with the address line image, so your recipient knows how special they truly are! Line your envelopes with the envelope liner die and the exclusive 4x6 paper pad. This paper pad has been specially designed to be lighter weight, so as to not add bulk to your envelope. You will wish you could see the smiles when the envelope is opened to reveal the liner patterns of happy words, polka dots, a large heart, or even a large hello. Along with the envelope liner die, 6 other dies are included. Use these dies to add custom seals to your envelopes, custom faux postage, or even cut out your own address labels. Take your envelope flap to another level with new stencils designed specifically for embossing. Each of the 7 stencils will leave a beautiful finish on your envelope flap. The mix and match possibilities of this kit are endless! Enjoy creating envelopes that will be the envy of all mail!"

The kit will be available exclusively from Papertrey Ink tonight starting at 10 PM EST.

For a closer look at all the contents and project ideas from Envelope Envy, you can watch the video below:

To watch here, simply click the middle of the video.
To watch in high definition, please click here: Envelope Envy Kit


The mix and match possibilities of this kit are truly endless! Over the next few days I will be sharing several "suites" of envelopes with you. Each of these groupings will show you different and unique ways to use the innovative products that I have designed and included in the Envelope Envy kit. 


The first suite today is definitely a show-stopping piece! I began by stamping the flower border image in black ink around the outside edge of the envelope. Each flower was colored in with pencil. I found that if I placed a piece of cardstock inside the envelope, I could avoid having some of the lines of the envelope showing through the coloring. 

The three-lined address image was stamped in Stormy Seas ink. I love the lines because I cannot write in a straight line!


To line the envelope, I used a striped piece of patterned paper from the paper pad. It was die cut with the envelope liner die in the kit. I love the detail of the small dotted edge all the way around! The light-weight paper also does not add bulk to your envelope. Which is important for mailing costs.


On the back of the envelope, on the flap, I inked through one of the stencils in the kit. Tropical Teal ink was applied. To close the envelope, I die cut a piece of the white sticker paper, also included in the kit, with the postage stamp die. I stamped a small heart and the word friend (masked off from one of the sentiments) onto the stamp and used it to "seal" the envelope.

No more plain envelopes! From simple stamping, to abundantly embellished, your envelopes will shine brightly and add even more love to your handmade cards!

To see more projects and for more information, be sure and visit Nichole's blog.

Sincerely Yours,


Related Posts Plugin for WordPress, Blogger...