Showing posts with label envelopes. Show all posts

Tuesday, November 27, 2018

Christmas gift idea for the card-maker in your life: Envelope Envy Kit

Need a gift idea for a card-making friend? Or perhaps you need to add something to your own Christmas wish list? Well, I have the answer for you-Envelope Envy!

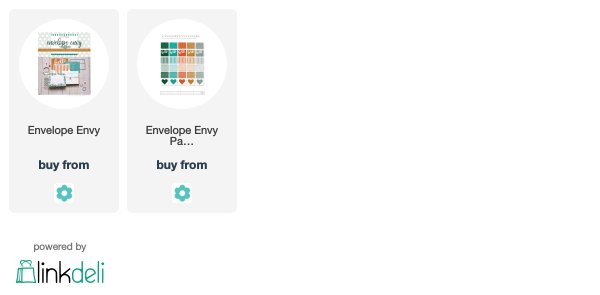
Envelope Envy is my kit from Papertrey Ink that launched late last year. This kit is full of everything you could ever want or need to make your envelopes just as stunning as the cards on the inside!

The kit comes with a die that creates a liner for standard A2 envelopes, with a straight flap closure. The die has two unique features-the outside edge embosses a beautiful dotted detail, and the middle scores the perfect fold. 

The kit also comes with a specially designed paper pad. Not only are the papers bright and fun, and they are sized to fit the die, but the coolest feature is the fact that the paper is lightweight! The liner will not add more bulk to your envelope! The Envelope Envy pad comes with the kit, but you can also purchase the pad separately as well.

There are stamps to decorate your envelopes, as well as a lined image to keep your address writing straight.

Create faux postage with the stamps and dies included in Envelope Envy. Perfect for when you are hand-delivering. Or, use the images to create custom envelope seals! There is sticker paper included in this kit in both white and gold!

Ink, stamp, die cut, and create to you heart's content! I have made so many envelopes and I have yet to run out of new ways to use the kit!

Stencils are another unique product in this kit. Lots of ways to emboss, or simply ink with these custom items.

I could not love the polka dotted pattern more if I tried! I am so thrilled that this kit is back in stock. It is product that I am incredibly proud of designing! You will love this kit and use it again and again and again! Happy shopping!

For more ideas:

YouTube:


Sincerely Yours,
Supplies with affiliate links. Thank you for blessing me with your purchase!
Friday, June 15, 2018

Now available! Love Word Die and With All My Heart Stamp Set!

It is time! The June release from Papertrey Ink is now live in the store and it is time to shop! Two items of mine that are releasing tonight are the Love die and the With All My Heart stamp set. These two products coordinate so beautifully!

I couldn't help but sneak in a matching and lined envelope using my kit, Envelope Envy. The heart paper inside the envelope really is a wonderful finishing touch to this card! They see the love when they open the envelope and feel it when they see your handmade card!


On this card, I used two techniques from my video tutorial:


If you missed it, be sure and watch soon! This video is packed with way more than 10 ideas and you will want to come back to the video for inspiration again and again!

I am also sneaking a peek (shhhhhhhh) of new products that will be coming out at the end of the month! Yep, 2 more products to share and I cannot wait to tell you all the special things happening!!

To everyone who has been emailing, commenting online, and cheering me on-thank you! The thoughtful and sweet words from each of you makes me happier than I could ever express!

Sincerely Yours,


Supplies, affiliate links used.

Wednesday, May 23, 2018

Envelope Envy back in stock + Papertrey Ink SALE

Yes, you read that correctly! Papertrey Ink is having a HUGE sale! Yay! That's the way to kick off a long weekend! Visit the Papertrey Ink blog for all the details!

Best news of the week? My Envelope Envy kit is back in stock! It has been amazing to see the gorgeously lined and decorated envelopes online! You have no idea how much it means to see creative card makers, like you, using products I designed! Your creativity is awesome!!


No need for plain envelopes any more! 

The sale will also include my very first kit, Modern + Marbled!

Modern + Marbled let's you create some incredibly elegant cards with marbled backgrounds! One single stamp allows you to create the look of marbling, in any color you desire!

The theme of the kit is thank you and it includes dies and stamps to create thank you sentiments. Along with small and large hexagons. Perfect for focal points, or for creating backgrounds.

The kit also contains gold foil and a glue pen. Look at the gorgeous envelope edges!

And you are not limited by the colors in the kit-go crazy with your marbled backgrounds!

Have fun shopping everyone!

Sincerely Yours,
Affiliate links used:

Monday, February 5, 2018

Mail It Monday: easy Valentines + video tutorial


Happy Mail It Monday! With Valentine's Day approaching quickly, its time to start making those sweet love notes to send of to those who mean the most! For those of you who say you aren't card makers, I have a quick and easy set of Valentine's for you to make today.

How cute are these envelopes and cards?! What would you say if I told you all those took were 4 sheets of patterned paper and one tool? Seriously!

I had a happy discovery the other day while playing with my new We R Memory Keepers Mini Envelope Punch Board. One of the envelope sizes is 3x4." Know what else measures that exact same size?! Journaling cards! So those adorable cards that you can cut from 12x12 pieces of patterned paper, fit perfectly inside the envelope! I love it. So easy. So crazy cute! Especially with these papers from Pebbles line, Forever My Always (linking you up at the bottom of this post)

To see how easy it is to use the Mini Envelope Punch Board, watch the video below.


For those wanting to watch the video in HD, or for those accessing this post via email, please click here: We R Memory Keepers Mini Envelope Punch Board Valentines

You will quickly become addicted to making these envelopes. The Mini Envelope Punch Board can make envelopes from 1x1" to 4x4." Measurements are all printed right on the punch board. Very smart. Plus, the punch board is so cute. Its small and adorable. Just like these simple Valentine's. Make sure you pop these inside a regular envelope, as they are too small to mail through the USPS. But no big deal, you wouldn't want to ruin these with stamps and all that anyways.

Happy Mailing!

 Sincerely Yours,

Monday, January 29, 2018

Mail It Monday: Envelopes + video tutorial

What makes Monday so great these days? How about Mail it Monday?! Mail it Monday is the day to be reminded to send happy mail to those who are important to you! The goal is to encourage you to send your beautiful handmade cards and for you to encourage others to do the same. 

How can you join in? Easy. Send cards. Post on social media with the hashtag #MailitMonday. Find a card drive and start making cards for a cause. Ask a new friend for their address and surprise them. Send a thank you note to your favorite paper crafting company and make their day. The ways to participate are endless and no matter how you join, you will be spreading sunshine and love!

Today's topic for Mail it Monday is about envelopes. Often neglected and kept utilitarian, its time for envelopes to get to have as much fun as the cards contained within them! This is also a shameless plug for my latest kit from Papertrey Ink, called Envelope Envy. Wink, wink.

First up, stamping on envelopes. From a stunning stamped floral border, to basic lines and images, stamping on your envelopes is an easy way to add a special touch. Especially when you choose a few different colors of ink. Drab to fab instantly.

My favorite thing to add to envelopes? Liners! You can cut pattern papers, or even stamp your own designs! There is a die template in the Envelope Envy kit that perfectly cuts a liner for A2 envelopes with a straight-flap closure. The best feature of this die? The dotted line that gets created around the inside of the cut line, it adds so much! If you have never cut an envelope liner before, let me begin your addiction with a quick video tutorial!


For those wanting to watch this video in HD, or for those reading this via email, please click here for the video: lining an envelope

Other fun touches? Stamping on the envelope flap. Embossing the envelope flap with a stencil.

How about adding a seal made by die cutting sticker paper? Stamping underneath the flap. Along the envelope edges. The possibilities are endless for adding special touches to your envelopes! Stay tuned because over the next several weeks, I will be sharing more fun ideas with you! Be sure and subscribe to my blog and my YouTube channel, so you don't miss a post!

Sincerely Yours,

Wednesday, November 22, 2017

Envelope Envy: creating custom faux postage and seals


Envelope Envy is now available for purchase at PapertreyInk.com!

I know you are as excited about this innovative kit as I am! And I cannot wait to see what you create with it! Be sure and tag Papertrey Ink or myself, and use the hastag #EnvelopeEnvy on social media! Or, if you don't use social media, send me an email, because I would truly love to see what you are creating!


Today's suite highlights the patterned papers and the dies. While these envelopes look like they took a long time to create, with the products in Envelope Envy, it will not take long at all!

The front of the envelope was stamped with the striped image down the side, the three-lined address stamp, and a heart. Quick, easy, and adorable!


Very often, I give my cards to people by hand, or they are included in a gift bag, or even a package I send. Adding this fun faux postage stamp to my envelopes is a thoughtful touch! I started by die cutting the white sticker paper included in the kit. I stamped two of the small hearts on the paper. Then, masking off the rest of the sentiment, I inked up the word love, and stamped over the hearts. So cute!

I lined the envelope using the large heart patterned paper. The heart will not show in its entirety and that is the intention of the design. The most important part will show when you have a card inside and when the recipient opens it.


For the envelope flap, on the back, I added a piece of polka dotted patterned paper. I placed the envelope flap on the back of the paper and traced it with a pencil. With three quick cuts by my scissors, I had the perfect piece to cover the flap. One of the sentiments from the stamp set was added along the bottom of the flap. 

To close things up, I cut a piece of the Luxe Gold Sticker sheet with the heart die. How sweet is that little seal?!


How I love all these extra special touches that can easily be added to envelopes! :D


Sincerely Yours,

Related Posts Plugin for WordPress, Blogger...
