


Welcome to this month's Release Countdown with My Favorite Things! You will find complete details each day on the MFT Blog, including how you can win prizes and full reveals of featured products.

Today I took the name of the stamp set a little too literally and went, well, overboard. With projects that is! Once I got creating with Go Overboard and the coordinating Die-namics, Let's Get Nautical, I couldn't stop! I have lots of fun tips for you today, including a short tutorial on how to get even more mileage from your stencils!
Looking at my stamps and stencils, I became curious. I wondered if I could ink through the stencils onto a stamp surface. Turns out, that yes you can! Using the new stamps, Watercolor Backdrops and the new stencil, Waves, I was able to create a super cool look to place my die cut gold anchor upon!

I started by inking my image with Blu Raspberry ink. Then I spritzed with water, just a couple of pumps from high over the stamp. I placed it onto my Primitive Cream cardstock panel and pressed gently.

While that dried for a minute, I placed Waves onto my now-clean stamp image. The same one I just used. The stencil stayed in place nicely on the surface and I pressed my Spearmint ink pad though until I got the coverage I wanted.

Here is a look at the ink on the stamp. You can see the image from the stencil came through perfectly.

Then I placed the stamp directly over the top of my first image. Note that I did not add water this time to give the stenciled image some more oomph.
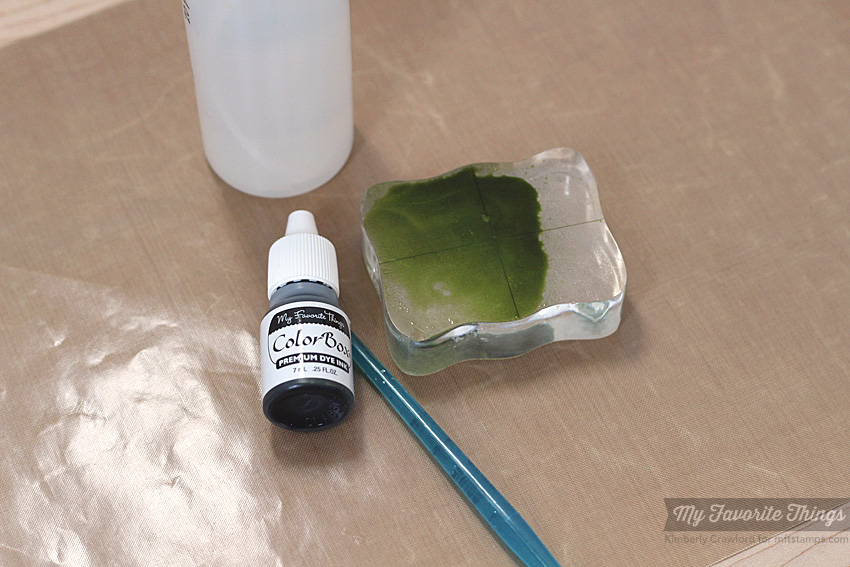
And one last tip for this card, the splashes of green. The splats. Or whatever you want to call them. Not knowing how to do these and desperately wanting to, I asked the design team for tips and they helped immensely! They suggested mixing my re-inkers with water. I did that by placing one drop of Jellybean Green re-inker on an acrylic block. Water was misted onto the block until it took on a lighter shade of green. I placed the end of my paintbrush, the non-brush side, into the mixture. I tapped the barrel of the brush repeatedly and off came the ink onto my project! It was so easy! I suggest practicing first on a practice paper, just so you get the feel for the size of the splats and the quantity.

Stripes. How I love you! How perfectly you work with the nautical theme! I stamped Striped Background in Spearmint ink onto Smooth White cardstock. Then stamped the sentiment from Go Overboard in Nightshift Blue ink.

To add some great depth to my die cut anchor image from Let's Get Nautical, I simply die cut two. One from Smooth White cardstock and one from Nighshift Blue. Fun way to add some pop, huh?

And one last card, I promise...simple and kinda cool. I cut a piece of burlap slightly smaller than my card base and then adhered it to the base.

There you have it. Lots of fun ways to use these new products! Be sure and head over to the MFT Blog for all the great links and more info! And tonight is the night! The next time I post it will be time to run to the store! What's on your wishlist?
thanks for stopping by!
~kimberly
Supplies for Watercolor Anchor card:


Supplies for You Keep Me Anchored card:


Supplies for Ahoy card:


13 comments:
You are SO creative! Love these, especially the first one!
Awesome work Kimberly!! The first is my fave!!
Great cards and inspiration...thank you!
Beautiful cards and I love your stencil/ stamping technique! The result was fabulous!
mmmmm! I love that first card. soooo, so cool! thanks for sharing how you pulled it together.
Love both cards. Curious about what you used to adhere the burlap. I've not had good luck using this on cards and I just hate when they come apart.
Wowzers GF! You rocked today!
All great cards! I love the burlap! Thanks so much for the "splats" tip! I really love that card & the splats just finished it off perfectly!
Super adorable cards!!! Love them ALL!!!
Sylvia xx
Wow-I love all 3!!! Thanks for the tutorial- your directions are always clear and to the point.
all are fab...thanks for sharing
Soooo cool, I love them all!
Laura
I'm in L-O-V-E with all of these. <3
Post a Comment