Showing posts with label Fathers Day. Show all posts

Tuesday, June 12, 2018

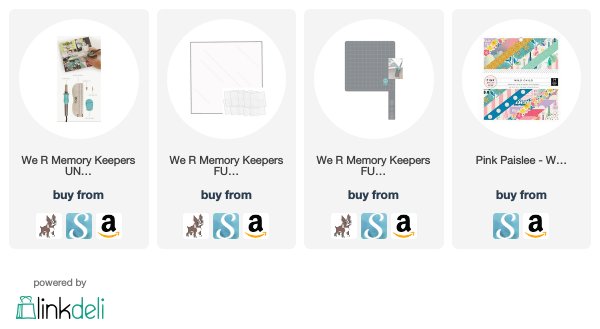
Father's Day Card - tie candy holder with FREE template

Dads and chocolate, and also in our case, grandpas and chocolate! Its a great combination and makes for a super fun Father's Day card! With the FREE template I have provided and your We R Memory Keepers Fuse tool, it is easy to create!

To start with, print this FREE template using the link to download HERE:

Cut the tie from the paper, making sure to leave the outer edges of the paper intact(so it maintains its basic shape for more tracing). Trace the tie onto patterned paper and cut out. Using the left-over paper from the tie template, as a guide, place it over a Fuse Clear Sheet. Trace along the edge of the paper with the Fuse to create the candy pocket. Do not seal the top, so that the candy can be pushed inside the tie-shaped pocket. For more tips on creating this candy tie with ease, visit the 

Customize your card with letter stickers, papers, and more. This is a fun project and tasty too! I love when my design team assignments are exactly what I need to create at the moment. And of course the chocolate doesn't hurt either. Hey, I am my father's daughter. :D

Sincerly Yours,
Supplies, affiliate links used:
Thursday, April 30, 2015

the MFT Stamps May Release Countdown begins!


Welcome to the May MFT Stamps Release Countdown! Over the next several days I will be sharing projects with you featuring the new products releasing this month. As always, its a pretty great line up and the new design team members are starting to share their work on this release! The eye candy is unreal!

For my first card, I used the latest background image, Myriad Dot Background. There are going to be a myriad of uses for this background stamp! (sorry, I could not help myself!)

When I first looked at the image, I immediately thought of black polka dots. So I created a watercolor background using some pretty bright ink pads for the polka dots to sit upon.

I stamped and heat embossed the sentiment on a strip of acetate. The sentiment is from a new stamp set called, For the Boys, from Lisa Johnson Designs. This sentiment however, is perfect for anyone! 

To adhere the acetate to my card, I scored the edges around the watercolor panel, securing the edges to the back. It does look a bit curvy in the photo, but it will lay flat, easily. (I had to pop it up for the sake of photography.)

One final touch was a few die cut metallic gold stars created with Die-namics Blueprints 25.

And now for a couple of cards for Father's Day. When making masculine cards, I tend to keep things clean, simple, and bright. The color palette for this card came from one of my husband's favorite shirts. Seemed like a smart way to chose colors that I know he likes! :)

Using Die-namics Terrific Ties, I cut a panel of Sweet Tooth cardstock three times, moving the tie image each time. 

Then on another panel of Sweet Tooth cardstock, I stamped Plaid Background Builder in Blueberry and Limelight inks.

Before adhering the tie cut (hahaha, I am cracking myself up today) piece of cardstock to the card base with foam adhesive, I stamped a two-part sentiment from, For the Boys. The stars are also from the same set.

More clean and simple again on this card, but this time with a little more color. I die cut Sweet Tooth cardstock with Die-namics Terrific Ties and stamped the coordinating bow tie image upon it in Orange Zest ink.

Then I stamped my panel (Sweet Tooth cardstock, Die-namics Blueprints 24) with a sentiment from For the Boys. The small row of stars image seemed to be the perfect complement to the sentiment. (I would really love to see this card in a red, white, and blue palette with the American Flag for our service men and women.)

Well, the release is off and rolling. Be sure and visit the MFT Blog to be linked up to all the new designers and their amazing work! And of course, there are always chances to win there too!

thanks for stopping by!

~kimberly

Supplies for You're Great card, available May 5:


Supplies for Thanks for the Time card, available May 5:


Supplies for My Hero card, available May 5:

Monday, May 26, 2014

easy to create Father's Day gifts


Welcome to the May Creative Challenge! This month the design team has been challenged to create cards and gifts for the men in our lives. With Father's Day not too far away, I headed in that direction with my projects. Be sure and head to the MFT Blog and see what everyone else has created! Its pretty impressive!


As I started working on this challenge, I went to my stash and grabbed anything that would work for a masculine set of projects. That included stripes, plaids, grids, clean fonts, basic graphic shapes, and anything guy-themed. Doing that limited my supply choices and made my projects come together much more quickly. As far as determining color choices, I used the photo in the frame as my starting point. The green of the grass and the blue in the guy's shirts was pretty manly. :) The orange was added for some pop.


The first part of my ensemble was the card. The Kraft cardstock panel was stamped with Grid Background in Grout Grey ink. The words are from To the Point and those were stamped in Sour Apple ink onto Sour Apple cardstock. The tie was cut from Steel Grey cardstock using Die-namics Suit and Tie. Pinstripe Background was stamped on the cardstock to add some fun details. The words were die cut from Die-namics High-Rise Uppercase Alphabet and Die-namics Little Numbers, using more Sour Apple cardstock


The second project is a photo frame made completely of cardstock. Kraft cardstock was cut with Die-namics Superstar Photo Card Frame. I adhered it to a panel of Sour Apple cardstock, cut slightly bigger than the frame. Nightshift Blue cardstock was cut with Die-namics Star STAX. I stamped the stars with Pinstripe Background. The word dad was cut from Sour Apple cardstock with Die-namics High-Rise Alphabet Lowercase. Perfect, right? Superstar Dad!


Here is a quick photo tutorial on how to create a frame back from cardstock. Its quick and easy. I thought this photo frame would be perfect for my hubby's desk at work and he agreed! He liked the size of the frame, which is the size of an A2 card. 


One last fun and easy project---bottle tags! My hubby loves old fashioned bottled root beer. So, he got it as a treat a little early...pretty sure I did not hear any complaints. :)

I continued using the same stamps and papers and Die-namics as I had before, so these tags came together in a matter of minutes!


To make the base of the tag, I cut Kraft cardstock with Die-namics Fishtail Flags Layers STAX. I used the largest die in the set. I then die cut the circle with Die-namics Circle STAX Set 1. To figure out which circle to use, I simply slipped the dies over the top of the bottle. (Tip: when you are cutting from a specific place in your cardstock, use a small piece of low-tack tape to hold the die in place while you pass it through your machine.) I scored below the circle to put the bend in the tag. 

thanks for stopping by!

~kimberly

Supplies for UR The Best Card:


Supplies for Superstar Dad photo frame:


Supplies for #1 Dad Bottle Tags:

Related Posts Plugin for WordPress, Blogger...