Showing posts with label Embossing. Show all posts

Monday, March 16, 2020

Die Cutting and Embossing with the We R Memory Keepers Revolution

Die cutting and embossing are my two favorite card-making techniques! And while I love using them for cards, they are also awesome for scrapbook layouts as well! We R Memory Keepers has a new manual die cutting machine out called the Revolution. It is really smooth and creates clean cuts and deep embosses!

The plates and platform are so easy to use. The base is also magnetic, making it easy to keep your dies in place while passing everything through the machine.

See how clearly everything is labeled? So smart! So easy!

Check out the details on the white card stock circle! Visit the We R Memory Keepers Blog for way more details and visit me on Instagram @kimberlystamps for a video look at the Revolution!

Thinking of you all in these unusual days. Stay healthy. Stay safe. Stay home. Praying for everyone in the days ahead. Sending you much love and a massive, socially-distant, hug!

Sincerely Yours,
Supplies used. Affiliate links shared here. Thank you for supporting my family in this way!

Tuesday, February 4, 2020

Valentine's Day Cards - adding texture with embossing folders

Love is in the air! It is time to start making and sending those Valentine's Day cards! These cards came together in minutes with some great tools from We R Memory Keepers and products from Heidi Swapp!

Using the new We R Memory Keepers manual die cutting machine, the Revolution, I ran some striped patterned paper from Heidi Swapp through the machine in a heart embossing folder.

After I took it out of the embossing folder, I gently sanded the top of the raised surfaces off with 180 grit sand paper. Doing that exposed the white core of the paper and added awesome depth to my texture! 

On the paper, I added stickers with sweet words of love.

Visit me on Instagram @kimberlystamps and check out my post and stories for more details and tips and tricks! I love sharing helpful ideas there, because I can share them as I have them happen while I work. I love it! Hope to see you there!

 Sincerely Yours,

Supplies used, listed with affiliate links. My family appreciates your support! And so do I! :D

Friday, January 4, 2019

NEW Mini Evolution Advanced from We R Memory Keepers


ETA: Here is the shopping link http://gohsn.co/WeRMemoryKeepers

The 24 hour craft day on HSN is Tuesday!

The latest die cutting machine from We R Memory Keepers is arriving at HSN! Be sure and check your local listings for the times that this new machine will be available. Not only the machine, but also some really cute products that will be exclusive to HSN! I was excited to play with these new goodies and share them with you!
The Mini Evolution Advanced is the cutest little die cutting machine there ever was! This machine packs all the punch of a larger machine, but in a portable size. The size is really great for people who craft in a small space!
The machine comes with the plates you need for both die cutting and embossing. Simple and easy, the plates are labeled clearly, like all great tools from We R Memory Keepers!
This exclusive kit comes with a mini Precision Press Advanced. The stamps that  come with the kit are designed to line up perfectly inside the press. The base of the stamp is actually notched to line up with the pegs!
After being able to build up layers of stamped images, that are lined up perfectly, you can then use the combo die/embossing folders to take these images to a whole new level. I have never seen anything like this before and the idea is SO clever!
See the details? And the images can be bent to add even more dimension! Look at those hearts!! Be sure and check in with We R Memory Keepers and HSN this weekend on Instagram for more information and details. Happy Weekend! 

Sincerely Yours,

Monday, October 15, 2018

Sending Joy - available now!

It is time! The October release for Papertrey Ink is now available! For all the release information please visit this page: October Release. To purchase Sending Joy and Sending Joy Dies, please click the images at the bottom of this post. Thank you, one more time for all the love, support, comments, messages, and emails! I could not be more fortunate to have such a wonderful group of people surrounding me! I could never express how much it means to me!

For tonight's cards, I used one of my personal favorite images, this diamond from my set, Bold Basics. It creates one lovely focal point on a card!

After stamping and heat embossing the diamond image from Bold Basics, I began layering my stamped and die cut images from Sending Joy. The elements in this set are perfect for mixing and matching. I am pretty sure there is no way to use this set "wrong!"

The last step was adding the stamped and die cut word joy. Oh, and to finish it off, I added one of the straight-line sentiments from Sending Joy. I masked the image off to make it fit into the design of my card. Using a post-it note, I inked the first two words and stamped them. Making sure my image was clean and dry, I once again masked and added ink, but this time to the second half.

One more card. This intensely dark green cardstock was giving me fits for photography, but the elegance of the rich color with the gold is stunning in real life! 

On the cardstock, I stamped and heat embossed the diamond from Bold Basics and the small pine branch image from Sending Joy. When heat embossing on dark cardstock, be sure and use an embossing magic pouch on your surface to help eliminate stray flecks of powder.
For more depth, I stamped the berries from Sending Joy and then applied gold Perfect Pearls. I will be trying this dual look again soon!

And I couldn't end this release without showcasing the main image of Sending Joy, the word joy. Have fun shopping tonight! I cannot wait to see what you make! Be sure and tag me on social media, or email me your projects! Seeing how your creativity uses images and dies is a thrill that cannot be described! 

Sincerely Yours,
Supplies. Affiliate links used. List will be updated as quickly as possible.

Tuesday, May 8, 2018

7 unique way to use a stencil for card making - Video Tutorial

One stencil, that is all it took to create these 7 unique and different cards. Pretty amazing what you can create with one awesome tool like a stencil! I fell in love with the Art Stencil Floral from Gina K Designs and I had more fun playing with it! So, I made a video tutorial for you on all the techniques I used. Each card has its own section in the video that is quick and short, but hopefully inspires you to give a few of these cool looks a try! 


For those who would like to watch this video in HD, or for those who are reading this via a reader or an email, please click here: 7 Unique Ways to Use a Stencil for Card Making

First up, color pencil. This one doesn't need much explaining, Simply color and add details!
This card above is embossing with highlights from wax paste! 

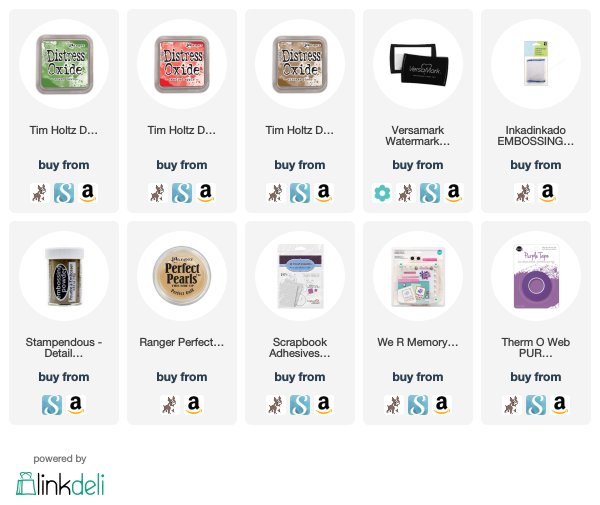
Gold foiling on clear transparencies? How elegant is this?! Special products from Therm O Web create this amazing look! All the supplies used are listed below.

Light modeling paste and the fabulous new ink colors from Gina K Designs. So easy, and so much pop! After adding the ink, I trimmed the image away from the cardstock it was upon for even more impact.

Copper metallic paste on navy blue paper. Stunning! And easy! Look at all the texture it creates.

The two-tone watercolor technique makes another appearance. Of course this could be done with basic watercolors as well, but why not add a twist for even more beauty?!

And finally, the basic inking technique. Nothing wrong with good, old-fashioned, perfection on a card! I hope you enjoy the video and reference for ideas for the next time you grab a stencil and start creating a card!

Sincerely Yours,


Wednesday, April 5, 2017

We R Memory Keepers Evolution Advanced


The details that embossing folders and dies add to cards is pretty incredible! It gets even better when its easy to change from embossing to cutting! I hate fumbling around with all the plates. It seems like I always create the wrong sandwich. The We R Memory Keepers Evolution eliminates the need for all the changing. By turning a simple knob on the side of the machine, you go from embossing to cutting in no time. With the same plates!


Visit the We R Memory Keepers blog for a closer look at the machine, and all the details on how to create these cards with amazing texture and shine!

thanks for stopping by!

kimberly

Supplies:


Monday, October 3, 2016

My Monthly Hero Kit October 2016

I am so honored to be hopping along with some crazy talented card makers today sharing the latest kit from Hero Arts! My Monthly Hero is a kit packed with goodies to make amazing cards and this month, its packed with shaker card awesomeness! This is a limited edition kit, so when its gone, its gone! You can purchase the kit by clicking here: My Monthly Hero October 2016.

The kit contains:
► A 4"x6" clear stamp set
► Dies for creating a snowglobe, snowdrifts and other background elements
► Seven coordinating Frame Cuts dies to match the stamp set
► Three pigment ink cubes in White, Silver and Baby Blue
► Eight White Cards and Envelopes
► Polar White Flower Soft
► Buttons Galore Shaker Mix
► Acetate Sheets in 4"x4.5" (7) and 4"x6" (1) for creating a shaker card
► Light Blue Gemstones


The kit includes dies to create snow globes. How perfect for Christmas cards! I began by cutting my light blue card stock with the globe top. To create the starry background, I used an add-on die to create a stencil by die cutting card stock with Star Confetti Fancy Die. Once the paper was cut, I was able to ink through it with a mini ink blending tool. Its a great way to stretch the use of your dies!

Behind the globe, on my card base, I inked a dark blue background, to create a night sky. The snow falling was created by stamping white pigment ink with the snow image from the My Monthly Hero stamp set.

I backed the entire panel with acetate then added foam adhesive around the opening and along the sides, knowing that I would be making a shaker card. (The foam adhesive around the opening is to create a well for the shaker items to move freely, and to stay inside the card. Its also added to the sides of the panel, to keep the top layer of card stock propped up without bending.)


To create the landscape, I used Snowdrifts Fancy Dies. This set of three dies is another add-on that can be purchased to coordinate with the kit. I love the layers of trees, trees and a house, and trees, a house and a little snowman! (Look very closely to find him.) I cut each of the die images from a piece of card stock. Keep in mind that these dies are unique in that they only cut the top of the image. Reason being that they allow you to control the length of the image. You could use these as the top of a card stock panel on your card, without the globe! So clever. (and wait, off to make a card with just that...)

I colored the tops of the scenery with Distress Markers and staggered the layers. Once I was happy with the placement, I adhered those layers to the card base. I poured some of the sequin seed bead mix onto my scenery. The top layer of the card was fastened over the top. To finish off the card, I added the base of the snow globe, colored with Copics and stamped with a sentiment. A bow was added also. And my absolute favorite part of the card is the Santa and his reindeer image! What is more magical than that?!


For this card, I went much simpler. This card would be easy to mass produce for your Christmas cards this season! To start off, I embossed a panel of white card stock with Circle Confetti Fancy Die. Yep, you read that correctly, I embossed with a die! I placed my card stock onto the die (cut edges up), topped that with an embossing pad, then passed it through my manual die cutting machine. How cool is that?! Then I die cut the same globe circle from the panel. Acetate and foam were added to the back of this panel, to make another shaker card.


For the inside layers, I used the scenery dies from the My Monthly Hero kit. They work the same as the add-on dies, but simpler in look. I cut the trees from a green card stock and a snowbank from light blue card stock. Those layers were trimmed to size and adhered to the dark blue card base. A sentiment was heat embossed in white on the card base. The sequin and bead mix were poured over the scene and finally, the top layer was adhered.

Using the third snowbank in the set of dies from the kit, piece of card stock that had double-sided adhesive on it was die cut. Once I cut it, I removed the backing, exposed the adhesive, and then poured glitter over the entire surface. It makes for a beautiful, snowy, and sparkly addition! It was adhered in front of the globe opening, along with a few more sequins.


Check out what these amazing ladies did with the kit:

What is a blog hop without a chance to win?! Here is your chance to win the My Monthly Hero Kit for October 2016! Leave a comment on my blog and all the others. One lucky commenter will win! Good luck!

thanks for stopping by!

kimberly

Related Posts Plugin for WordPress, Blogger...