Download your digital papers (like from Becky Oehler's site). Unzip them and save them to a memorable location. I created a folder specifically for my digital supplies. Each designer has their own folder. Once you have the papers downloaded, you may begin.
Open the photo program and a new document.
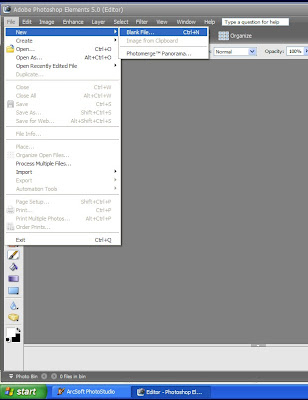 Make your document the size of a standard piece of paper. (8.5 x 11 ") You are doing this because the goal is to print your papers and use them to create a card.
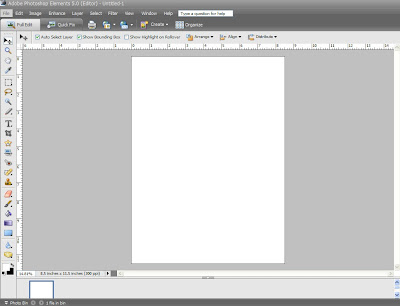
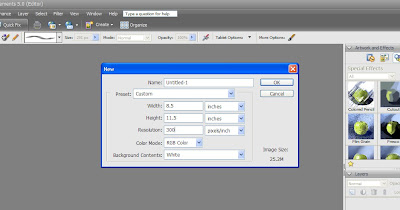 Here is the new document. This is the document that you will be pasting your papers and elements into.
 Go to the File tab and choose Open. You can select more than one paper to open by clicking on each paper while holding the CTRL button.
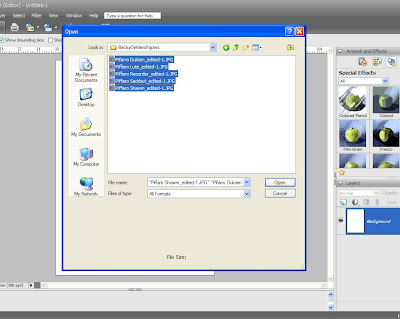 The papers and your new document will appear along the bottom. If they do not, there is a little window that just needs to be pulled open. You will get a double arrow on the line. Click and drag until you see the papers.
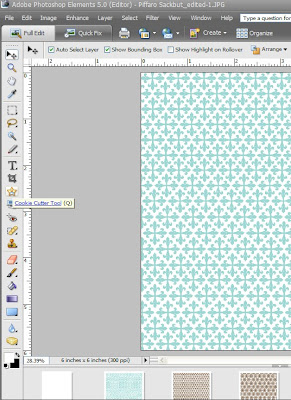
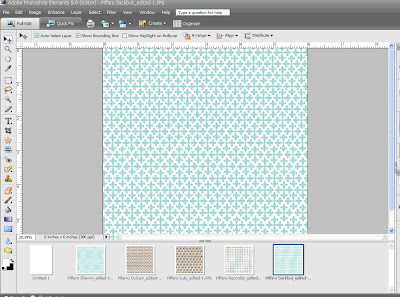 To make the papers the size of an A2 card, I use what is called the Cookie Cutter tool. It looks like a cute little star.
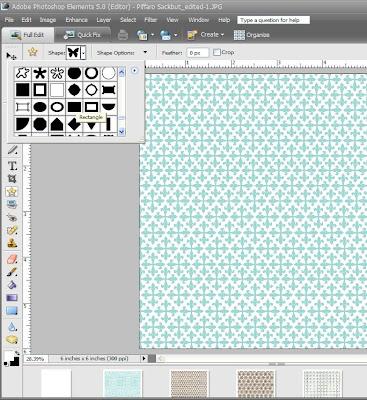
 There are tons of shapes to choose from. I select the rectangle.
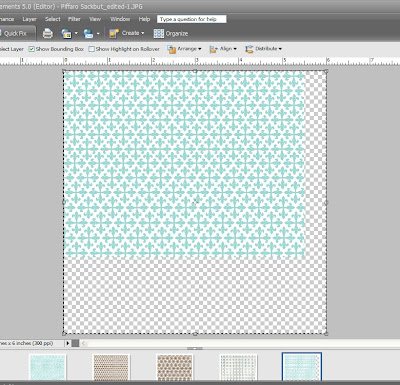
 Using the rulers along the top and sides, I click and drag until the rectangle measures 5.5x4.25". You can make the paper any size you want by clicking and draging to the dimensions that you choose. Keep in mind that it has to fit on the 8.5x11" paper to print.
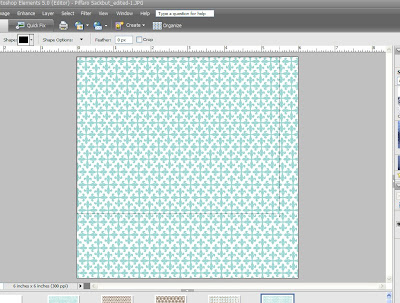 Once you have made the rectangle the size you desire, click.
You will want to select the screen. I use the shortcut CTRL+A.
The marching ants will show up around the entire paper. (don't worry, it will only copy the shape you chose.)
Then to copy the rectangle use CTRL+C.
 Click on the new document you created.
Type CTRL+V to paste your rectangle.
You will be able to move your shape to any location on the page.
If you encounter problems, remember to choose the arrow tool on the top to manipulate the image.
You can easily get 2 papers on this page. It is now ready to print.
 Making Shapes with Digital Papers:
There are many options with the Cookie Cutter Tool. Have fun creating all sorts of shapes and elements.
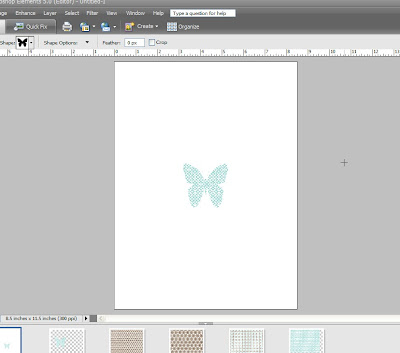
I chose the butterfly shape.
Anywhere on your patterned paper click and drag. You can make the shape as large or small as you desire.
 Follow the same steps as you did with selecting and copying the rectangle. CTRL+A to select, CTRL+C to copy. Click on your new document and CTRL+V. You can still manipulate the size of the image once it is pasted. I paste several different shapes on the document and change their sizes.
 Cutting out Images from your Patterned Paper:
Choose a paper that has an image you may want to "cut" out.
Select the lasso tool.
 Zoom into your patterned paper to make it easier to cut. Click and drag all the way around the image you want removed. Do not stray into the image or into another image, because the tool wil take away or bring in those parts when you copy the image. Bring the start and the end lines together.
 Same steps again. CTRL+A to select. CRTL+C to copy. CTRL+V to paste into the new document.
 You can also manipulate the size of the "cut" out shape too. Click and drag again.
When you are printing your papers and images, I would recommend a good quality matte photo paper. Its a little pricey, but it is what the digital ladies use to print their creations. I picked some up at Office Max. (to make all my cards, I only used 3 pieces of paper)
Hope this helps you out. Digital really is easy, especially when you learn a few tricks. If you have any questions, leave them in the comments and I will try and answer them.
thanks for stopping by!


.jpg)


7 comments:
Oh Kim, this is great. Thanks for such a thorough tutorial. I know it takes time to put these together and you did a super job. I'm anxious to give this a try--now that I get it! LOL
I'm sure I'll have questions, so don't be surprised if I come back to ask a few!
Thanks again.
Thanks for a great tutorial, I really liked your cards and all your creations! Glad to hear your son is doing well!
Melissa
Great tutorial Kim - I will have to use this one for sure! I get so overwhelmed at times when I try to do digital things!
Hi Kim! I always brush off ANYTHING digital. I am a very "touchy-feely" type person so digital just isn't up my alley. HOWEVER, I saw the creations you made with this digital paper by Becky and fell in love with these digital prints IMMEDIATELY!! It is my goal to learn how to do this so I can use these prints. THANK YOU SO MUCH for the wonderful tutorial that looks very easy to follow. I think this will open a whole new world for me with regards to papercrafting!!
Wow, Kim...I don't know how I missed this tutorial, but I'm sure glad I found it. Your instructions are wonderfully clear. Thanks for sharing your expertise!
Thanks so much for the tutorial ... gorgeous creations.
Hi Kim,
thanks for this awesome tutorial, i thought i give it a try yesterday but it did not work :-(
Of course it is my mistake because i am not so good with photoshop.
I use photoshop elements. when i select the rectangle and click and draw in the paper and then let go of the mouse when i think the size is right i get a white rectangle and when i hit control+C nothing happens. Can you help me????
I hope you understand my english and don't mind my mistakes...:-)
Best regards
Ada (Netherlands)
Post a Comment